Ceramic 3D Printer
For my senior capstone project at Swarthmore, I built a 3D printer that uses porcelain clay paste as a build material. I received a grant from the Halpern Family Foundation Engineering Design Fund to begin work on the printer in the summer of 2013.
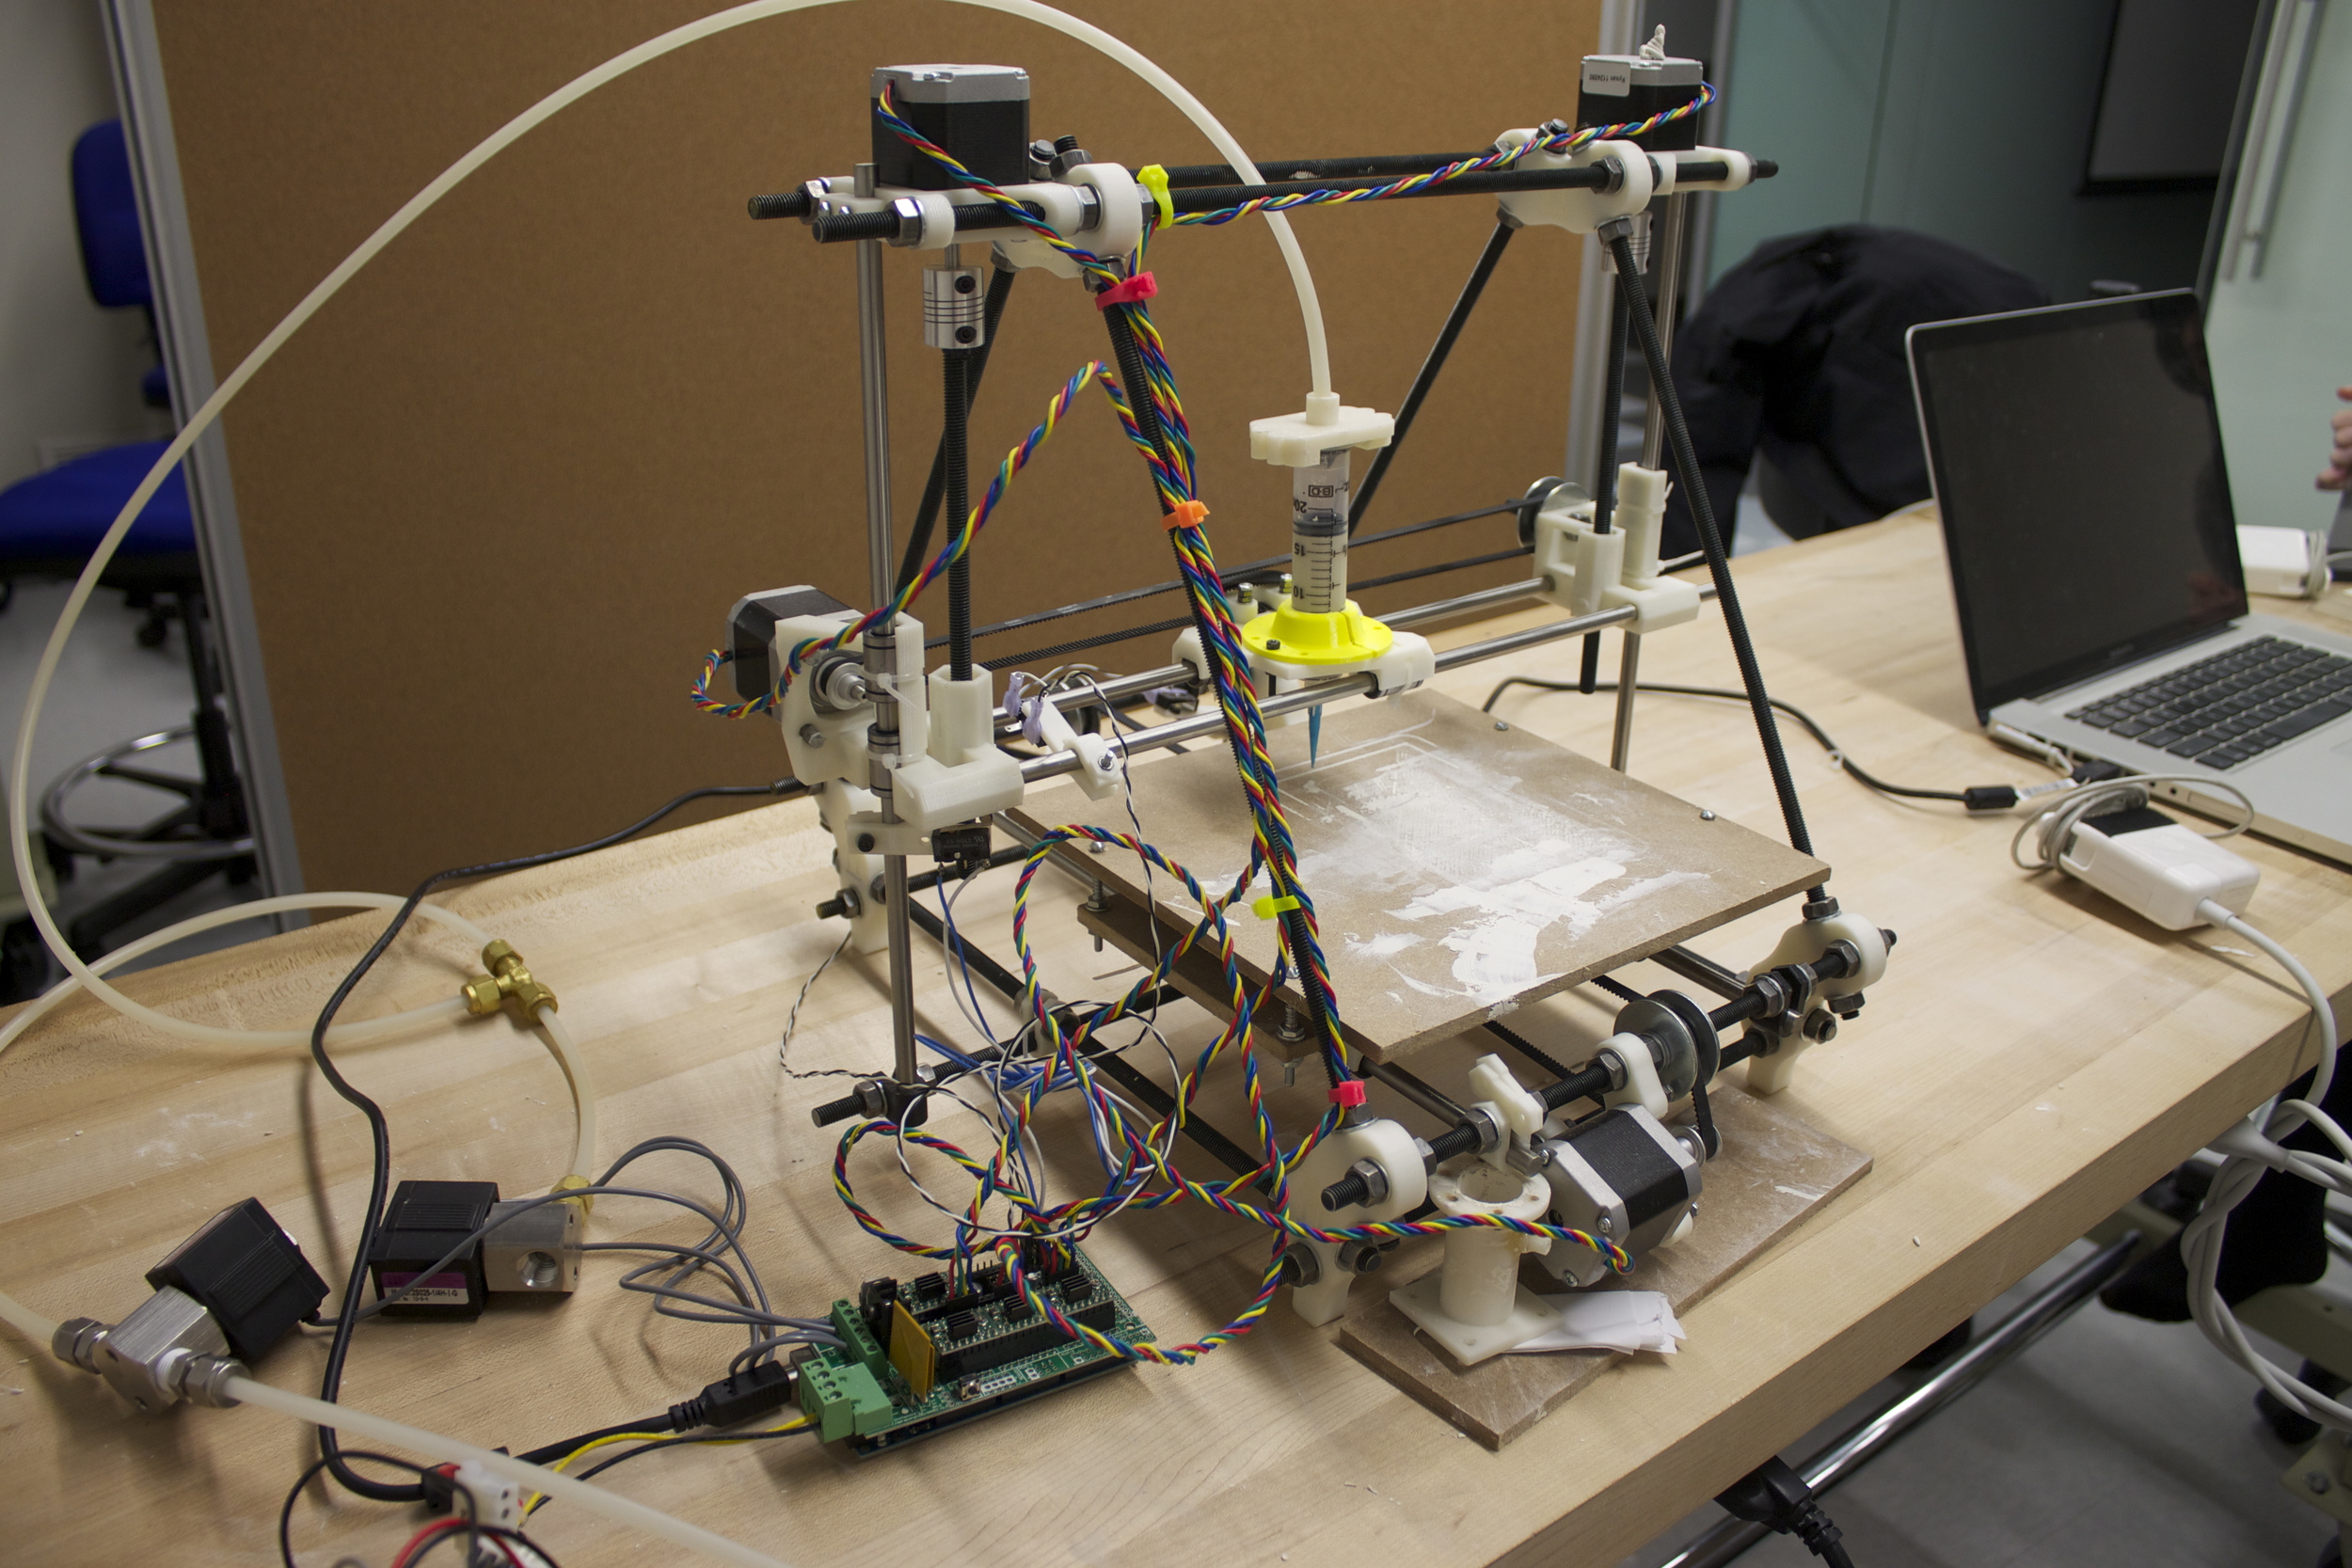
The printer is based on a RepRap Prusa Mendel platform, using RAMPS 1.4 electronics and Arduino-based Marlin firmware. I chose the RepRap platform for its low price, good online support community, and hackability. I printed all of the RepRap-able parts on Swarthmore's Dimension SE printer. I initially used the "sparse" infill setting to reduce print time. This setting worked well for larger parts but seemed to reduce the strength of smaller pieces such as the bar clamps, many of which quickly broke from fatigue. I replaced these parts with ones printed with solid infill. I've yet to see one of these crack.
The Extruder
The clay paste extruder was inspired by an air-pressure driven solder paste depositor. The body of the extruder is a 20 ml medical syringe filled with clay paste. When pressurized, the paste is pushed out of the extruder at a near-constant rate. Two valves are required to equalize the pressure in the extruder to atmospheric when you want to stop extrusion. Without a relief valve, clay will continue to ooze out of the extruder even when the pressure valve is closed. This could also be accomplished with a 3/2 valve, but I wanted to be able to control each valve individually.

A block diagram of the paste extruder system.

Extruder, complete with 3D printed quick-release mount that I designed.
Material
I used the same porcelain clay (Laguna WC617) that I use in my wheel-thrown pieces. This clay has a homogeneous texture, and its viscosity can be controlled by adding known amounts of water to known quantities of dry clay powder. I had both dried clay scraps and fresh moist clay on hand. For initial testing of the extruder, I added water to moist clay and cut it in with a fork, then mixed it with a putty knife. In an attempt to be more precise about the water content of the clay, I later mixed together dry clay and water, measuring each by mass.

Some freshly mixed clay paste.
Integration
The biggest design challenge was integrating the solenoid-controlled extruder with the RepRap electronics and firmware. I initially built an Arduino Uno-based controller (a simple MOSFET circuit) to switch between the valves when an input was given. I struggled to find a way to get the firmware to send extrusion commands to the system synchronized with the movement of the printhead. The plastic extruder designed to be used with this RepRap platform is controlled by a stepper motor, which makes it simple to synchronize with the stepper motor-controlled x, y, and z movements of the printer. This also allows for printing at variable speeds. Because the paste extruder runs at a single speed (ideally) and can only be turned on and off, I had to find a different solution.
After extensive, frustrating searching, I finally found a blog post in which someone else had integrated a MakerBot Frostruder (whose design I had unintentionally replicated) with a Prusa platform to print in chocolate. Our electronics were different, but the solution was the same: use the extra heater and fan MOSFET terminals on the RAMPS board to control the solenoid valves. I added g-code commands to the firmware for the MOSFET pins and tested to make sure they worked as expected. I managed to find the little documentation for the Frostruder that hadn't been removed from the Internet through Hannah Napier's GitHub page and used the skeleton of their frosterize.py program to process g-code files from Slic3r, inserting on and off commands wherever they were needed.
Calibration and Test Prints
In order to ensure that the movement speed of the printhead was synchronized with extrusion speed, I constrained the print speed in Slic3r to a fixed rate (in mm/sec). Initially, I determined this rate empirically for each print by setting the compressor to approximately 40 psi, extruding for 1 second, and measuring the length of the bead. After finding a speed that worked most of the time for consistency of clay I had mixed (around 40 mm/sec), I tuned the pressure of the compressor for future prints until I achieved extrusion at the proper rate.
I printed out numerous test objects. Some were more successful than others. 20 ml is a pretty small build volume, so I was limited in what I could print without switching to a new syringe mid-print (a difficult feat). With more time, I would've found some larger syringes to try to print larger objects or developed a system for switching out syringes more cleanly. At the beginning of the project, I had dreams of some sort of clay transport system that would allow for a near unlimited object volume, but this would require a different set-up, probably using some sort of positive displacement pump.

Bisque-fired test pieces.
For a more detailed description of this project, my report can be found here.